The video is taken by a phone camera placed behind the smart glasses.
What is it?
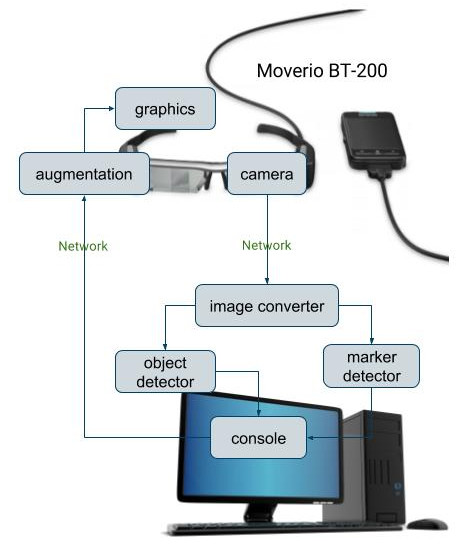
SmartAR is an augmented reality application on smart glass Moverio BT-200. It is able to recognize the context in front of the glass via Bag-of-Words algorithm, track fiducial marker inside the scene, and display augmentation based on its understanding.
ROS manages the messages within the network between PC and Moverio BT-200.
Object Recognition
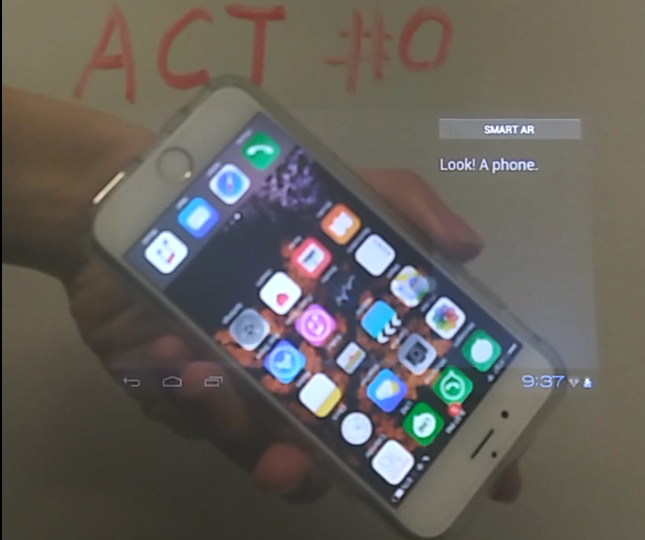
The object recognition algorithm here is very basic bag-of-words algorithm. A database of object images is needed on PC.
Thanks to the simplicity of Bag-of-Words algorithm, the recognition of known objects in this application is real-time.
Marker Tracking
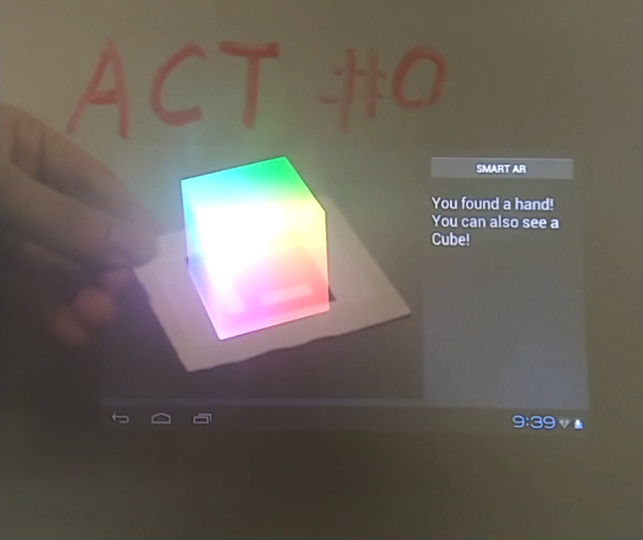
Aruco is used to track markers in the scene. In order to correctly overlay the graphics on top of the marker seen by the user, an optical see-through display calibration is needed. Here, the traditional Single Point Active Alignment Method is applied. Rendering is performed using OpenGL ES in Android OS. The result looks like this:
Both geometric and context augmentation are provided at the same time. The performance is real-time as well.
Google Virtual Reality headset evolved from Cardboard v1, to Cardboard v2, and to the most recent and elegant Daydream. Daydream supports limited devices, thus is excluded in the discussion here. For Cardboard v1 and v2, there have been a few discussion about the difference between them. As a VR / AR developer working with both headset, I looked at something different
Cardboard v1
Supported phone size: 5.3” maximum (Nexus 5, iPhone 6/6s/7)
Assembly: Self-assembly from a plain cardboard
Trigger: Magnetic trigger (triky on iPhone)
Camera see-through: Supported
Price: Extremely cheap but the original version is hard to access now
Cardboard v2
Supported phone size: 6” maximum (iPhone 6+/6s+/7+)
Assembly: Almost no effort
Trigger: Screen touch
Camera see-through: Not supported
Price: A little more expensive, but totally acceptable
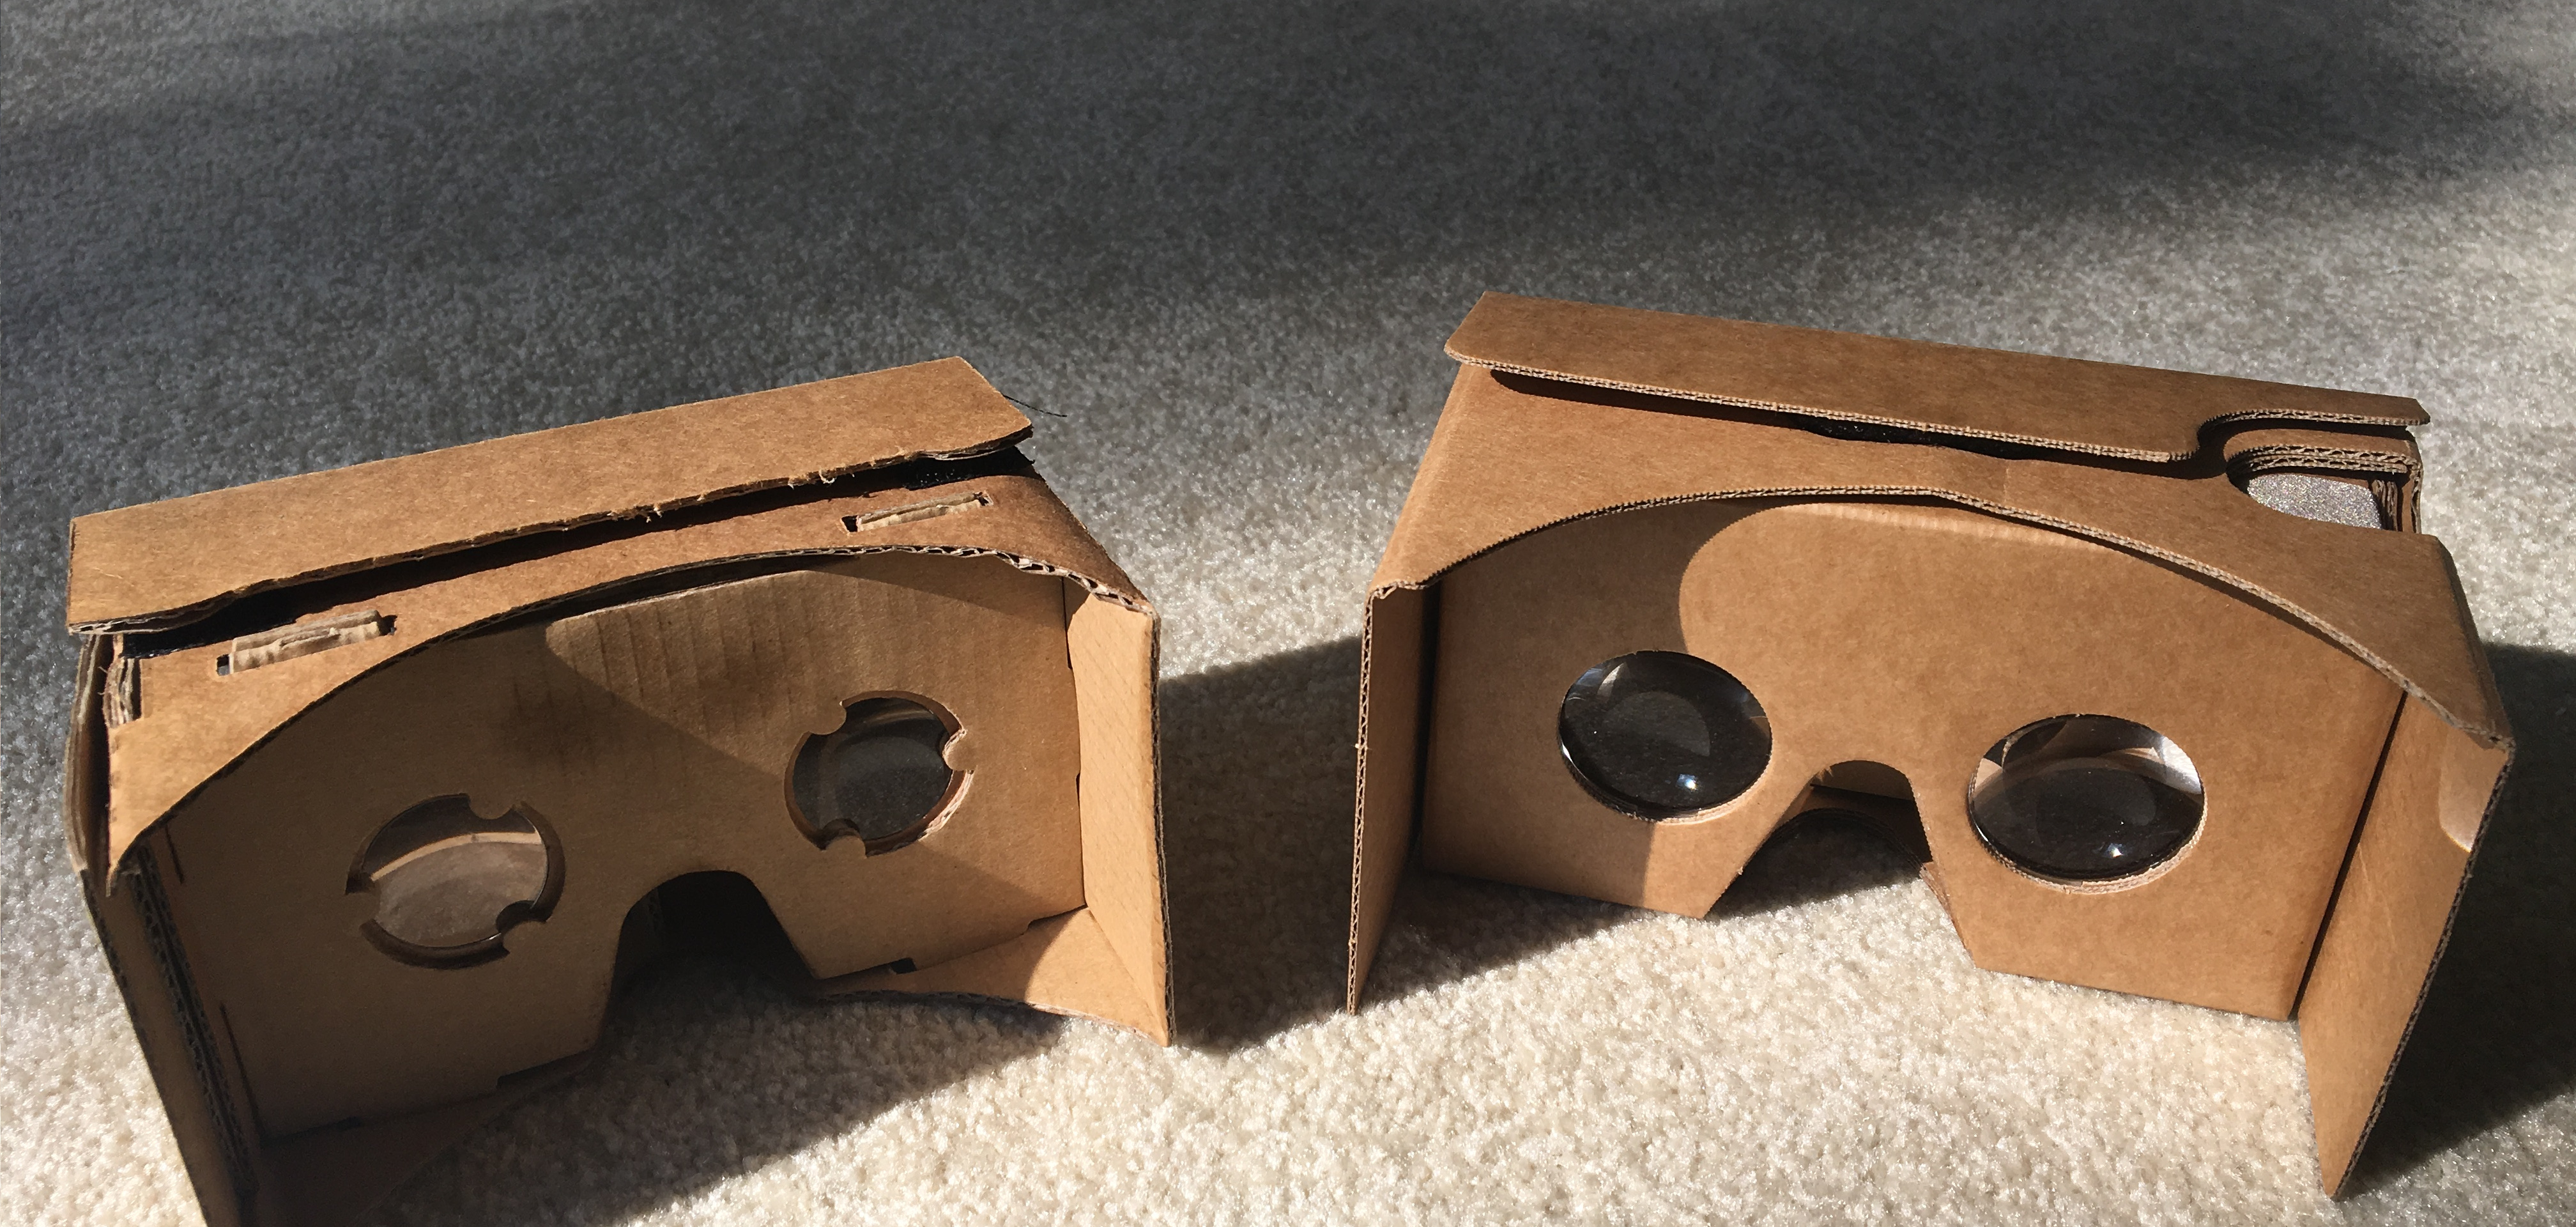
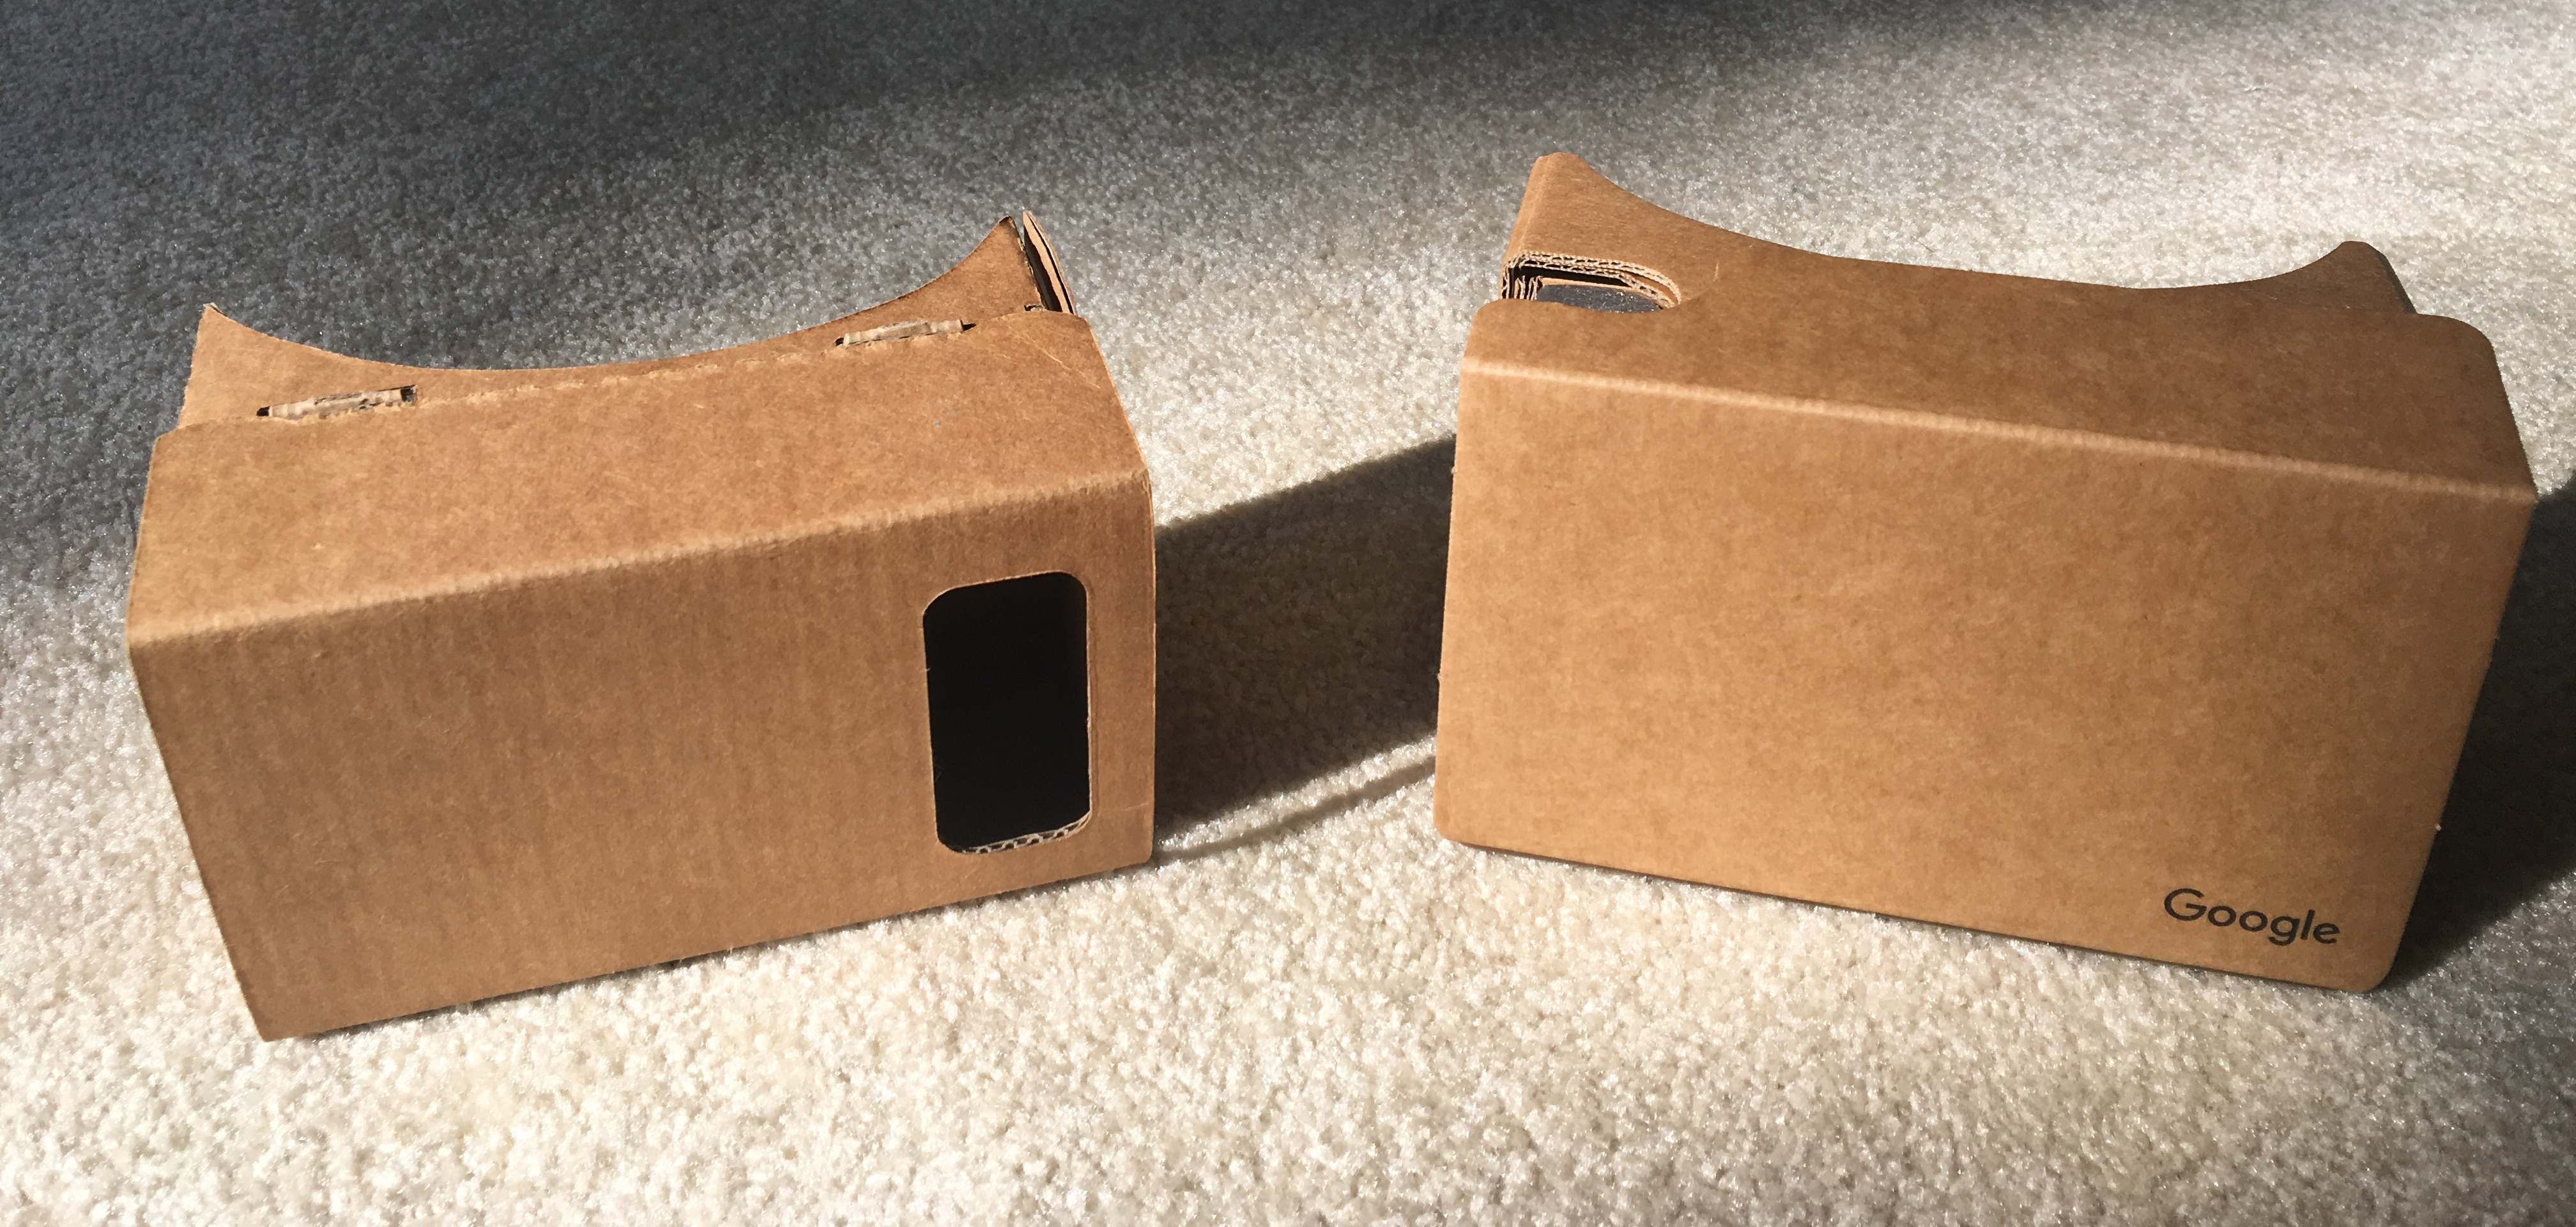
Back and front view of Cardboard v1 and v2
Comments
Since I have a Nexus 5 and iPhone 6s, Cardboard v1 is a better fit in terms of size. When I put iPhone 6s in Cardboard v2, the field of view is restricted by the size of phone screen.
Magnetic trigger is a problem in Cardboard v1. I admit that it is a very clever design to take advantage of magnetic sensor of the phone, however, the change of magnetic field can be caused by a few reasons, including the movement of the phone itself with respect to the magnet, the change of orientation of the phone (with respect to earth magnetic field). Touch trigger is much more stable. Even Google Virtual Reality (GVR) SDK removed the support for magnetic trigger in its later releases. Developers have to switch to older releases to look for it.
Self-assembly is never a problem for engineers.
Camera see-through is a feature I liked most about Cardboard v1. With camera video, the tracking of user can be enhanced. Imagining SLAM or marker-tracking based localization integrated with VR / AR game! Vuforia supports image tracking for Cardboard v1 as a pose estimator.
What about Augmented Reality
Google Cardboard is basically a VR headset, here I am going to turn it into a “AR” headset!
Requirement
For an augmented reality application to run with Google Cardboard, there are a few requirement:
Access to camera video of the phone
Render two views representing the vision of two eyes
Distort the image so that after the distortion of Cardboard lens, the images are natural for human’s vision
Real-time!
Pipeline
The combination of Cardboard v1 and Nexus 5 is chosen. Unity3D is the development platform. The rendering pipeline is:
Grab a video frame
Optional: do whatever augmented reality processing
Composite two views side by side and blit on screen
Video frame is accessed by WebcamTexture object of Unity3D engine.
Shader
Within this application, we are not displaying real 3D scene, what we have is only augmented 2D image. We select the part of image to display with disparity, faking an AR experience for the user, all the objects in the scene will be perceived at a fixed distance determined by the amount of disparity. We need fast pixel displacement!
Step 3, 4 and 5 are achieved by shader, especially fragment shader. Shader is very fast and powerful. Unity3D shaders can be categorized into vertex shaders, fragment shaders and surface shaders. Vertex shaders and fragment shaders are basic types of shaders that are inserted into graphics pipeline of most modern GPU. On mobile devices, OpenGL ES 2.0 supports both of them. Surface shader is a special type of shader dealing with lighting and textures. In compilation stage, surface shaders are separated into a vertex shader part and a fragment shader part.
In our application, we have video frame in a texture object, thus, we only need to displace the texture coordinates of screen plane to represent barrel distortion and disparity of two views.
Step 3, 4 and 5 can be implemented into three shaders, which is easy to maintain and modify but will require more render passes. I put them altogether into one shader, since they are all fragment shaders. Source code is on Github: cardboard_seethrough.
In order to render the texture directly on screen, Graphics.Blit function is called upon rendering, and the source texture object is replaced with our processed video, the target render object is set to null. According to Unity3D documentation, a null target render object represents the screen. Then the shader material is specified in order to achieve correct Cardboard style display.
Demo
Nexus 5 runs this application smoothly, with 20-30 fps.
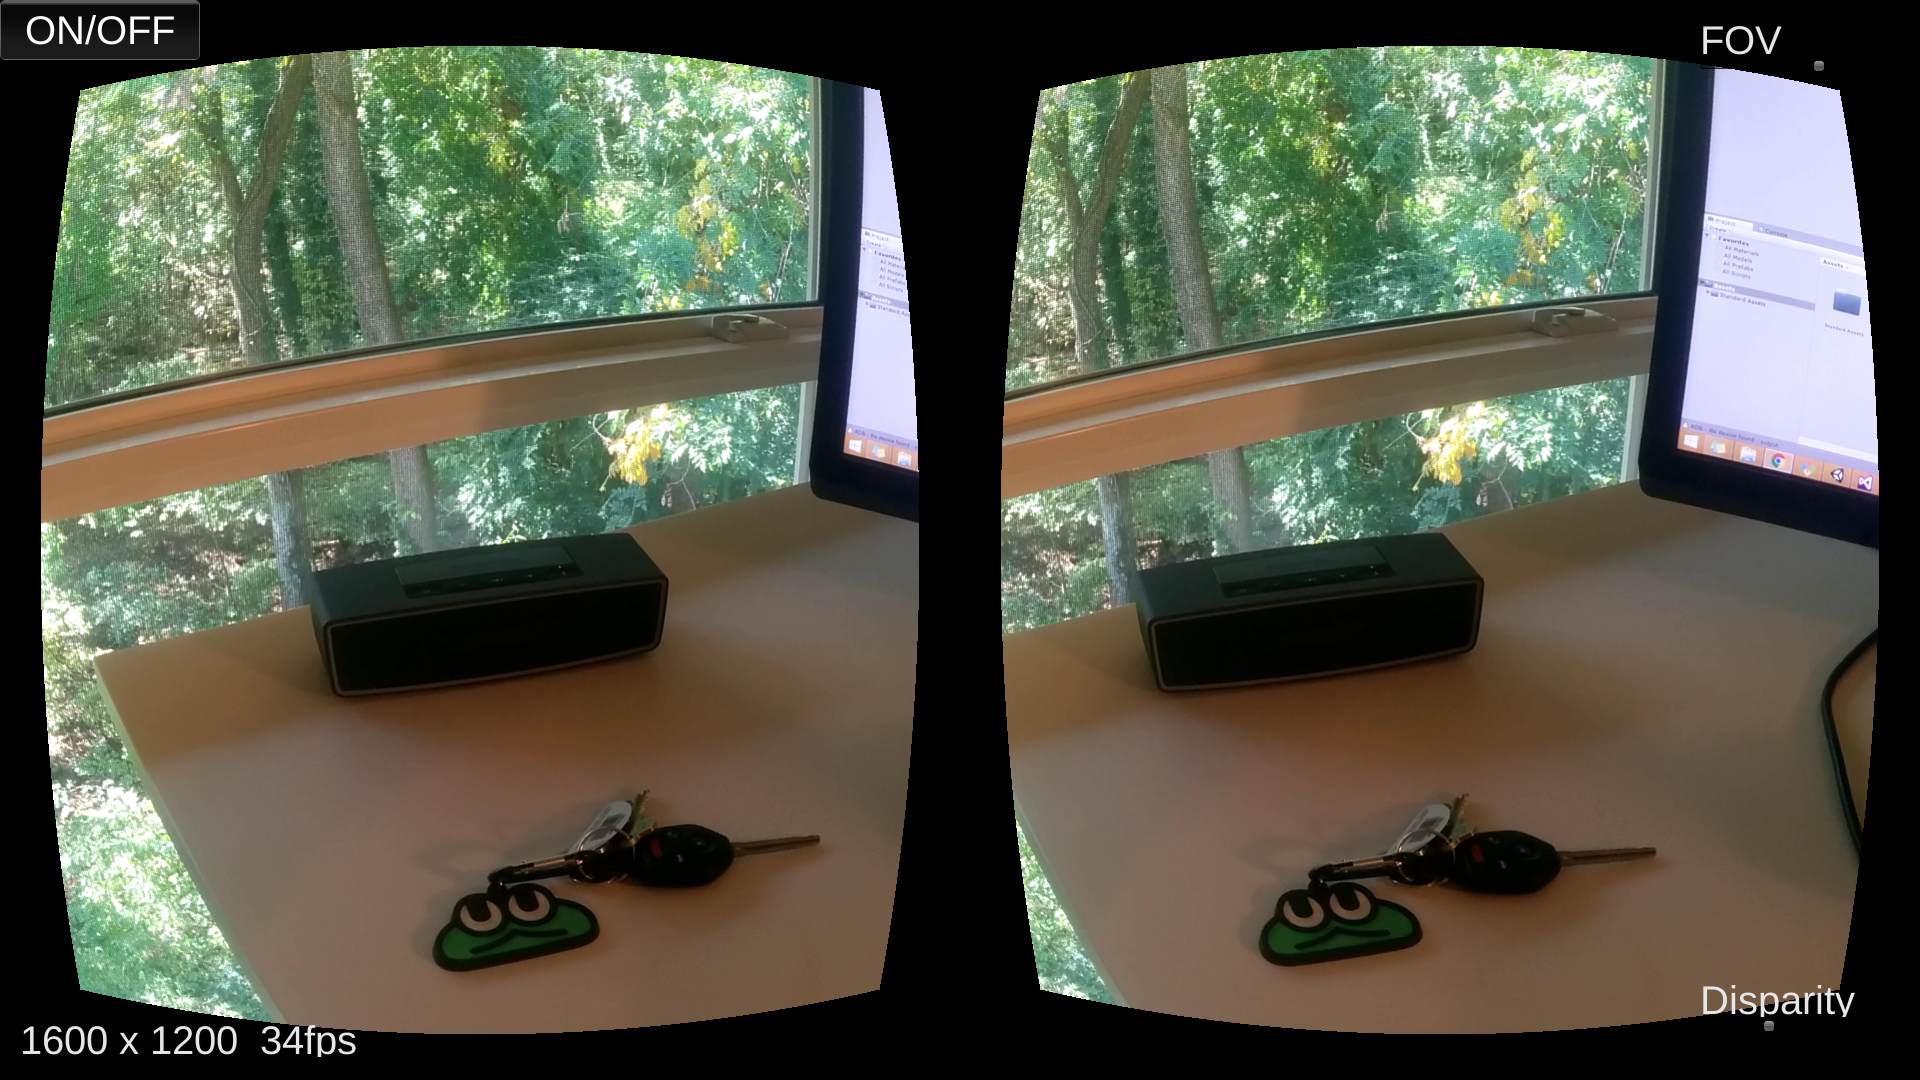
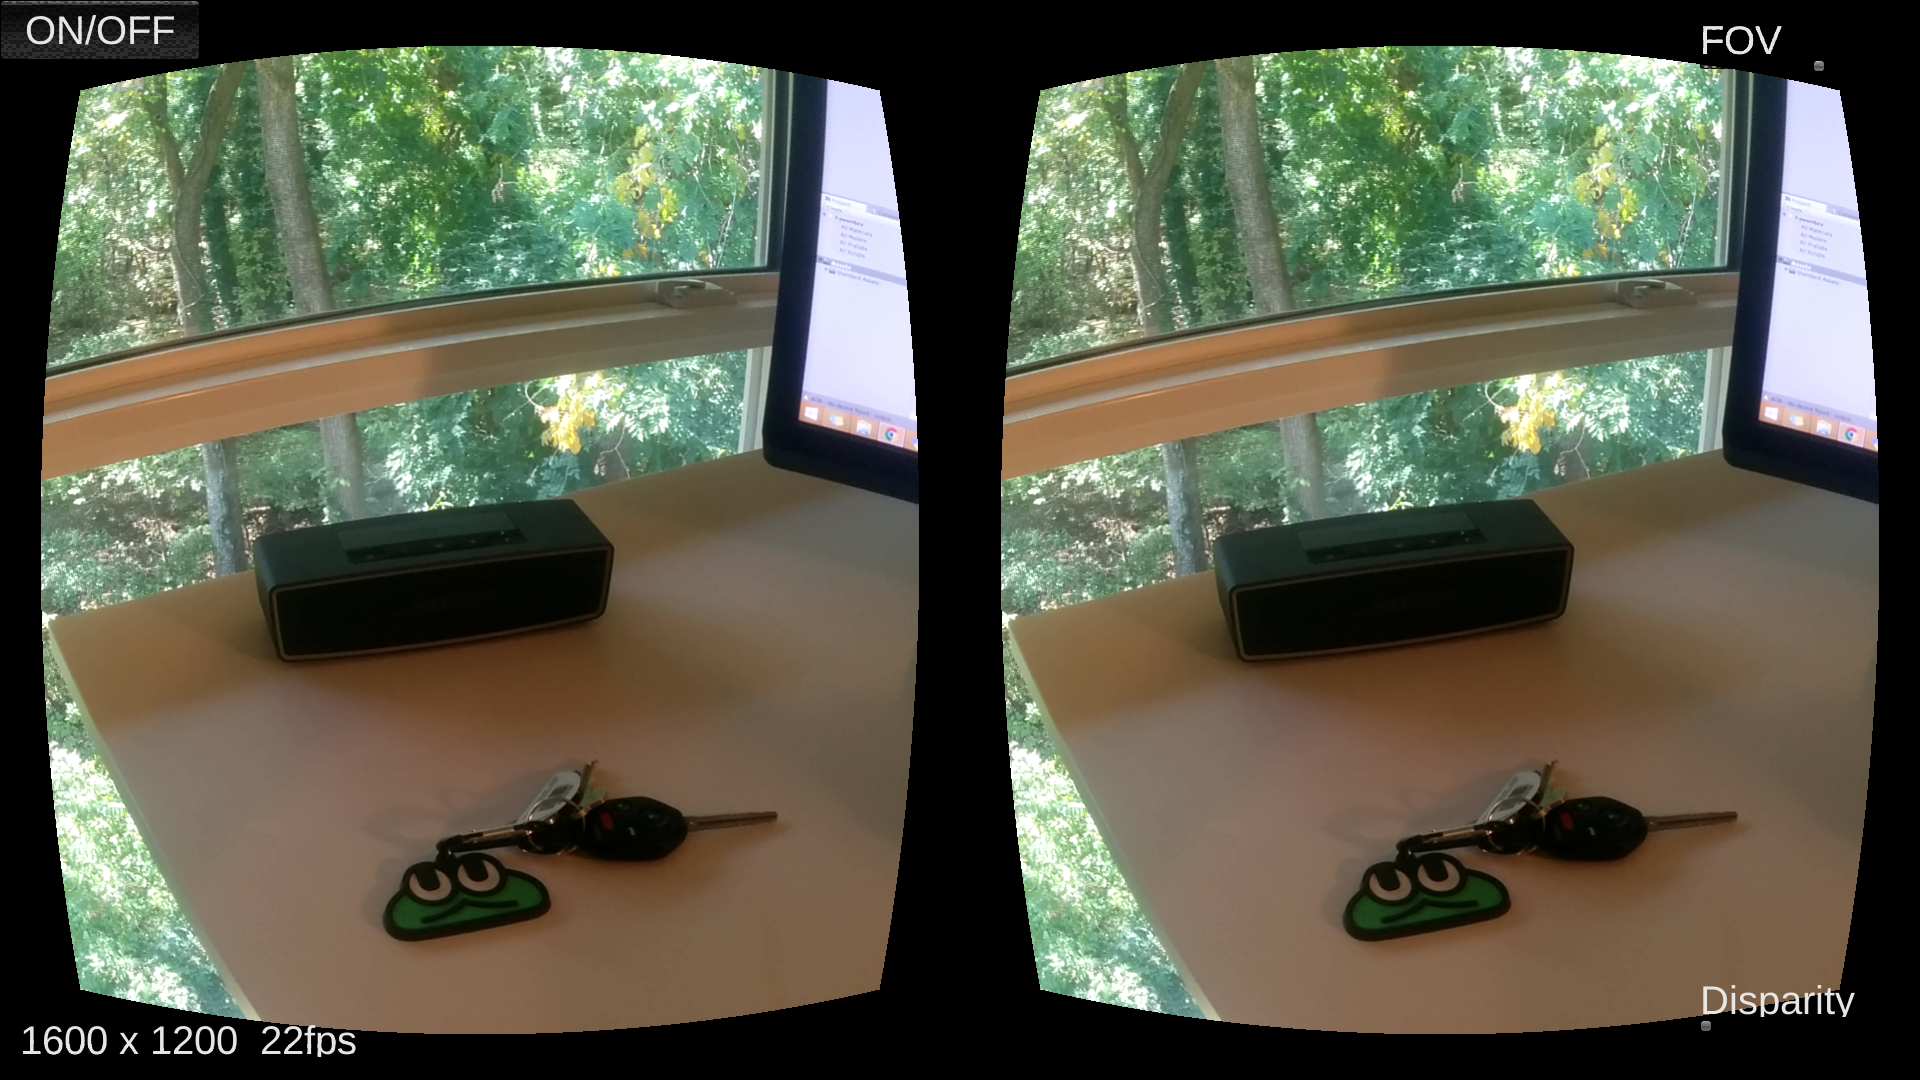
Screenshot with and without disparity
Several GUI elements are put on the GUI layer:
ON/OFF to control camera access
Display of FPS and current video resolution
Slider to control Field-of-View
Slider to control level of Disparity of two images
0 disparity indicates exactly same images on left and right